Trying CA65 (NES)
I've always been drawn to the NES as a gaming console. I was obsessed with it from the moment I got one of those Famiclones. That was the system where I first started making ROM hacks. For a long time, however, I was curious about what it would actually take to develop a game from scratch. Sure, I had only hacked existing games before, and creating a full-fledged game from scratch for such an outdated console seemed like a herculian task. But after watching a few videos made by NESHacker, I decided to figure out how to make my own """game."""
The goal was absurdly simple. A sprite, score counter, two tunes, and controller input.
My toolkit is pretty straightforward. I use Notepad++ for editing .asm files, ca65 for assembling and linking, YY-CHR for graphics, and Famitracker/Famitone for music and sound effects. A big thanks to Shiru for saving the asses of many homebrew developers worldwide from having to write their own sound engine from scratch every single time. As for the emulator, I use FCEUX. I know Mesen exists, of course... Which is a better option, but to stick with FCEUX out of habit.
Now, let's talk about the development process itself!
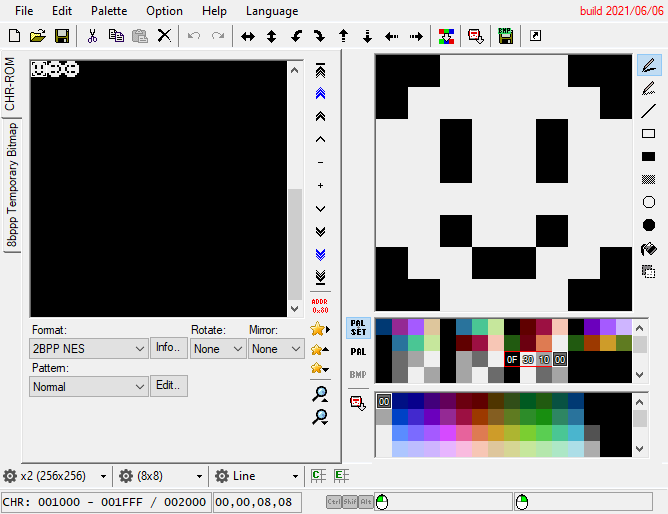
In a modern game engine, you just simply add a sprite object, or just drag it on screen. On the NES, however, you have to manually define those 4 bytes so the console understands exactly what "do you mean" and what to put on screen. Where to place it, what the sprite should look like, and so on.
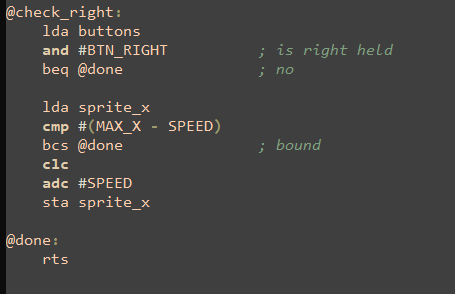
If you're used to something like "sprite.x += 2", then let's see how to do it in assembly.
LDA loads a value, such as the sprite's current position. CLC clears the flag. ADC adds a number to the value. Remember that "x += 2" example? Here, we add 2 to the value previously loaded via that LDA command. STA saves the final result back to "Sprite_X"
So, you will end up with something like: "LDA Sprite_X" "CLC" "ADC #$02" "STA Sprite_X".
In the end, LDA takes any value, CLC prepares it (rudimentary term), ADC adds any chosen number to anything that was previously mentioned in LDA, and STA writes the result back to memory so the console can understand it. You have to do this for every single action.
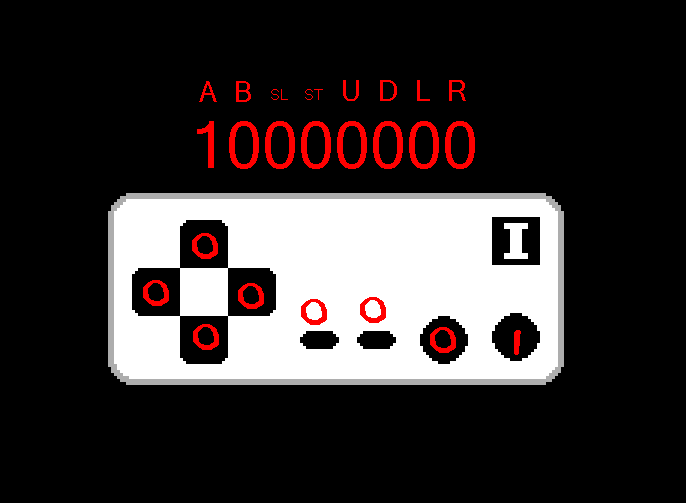
I implemented this for the buttons. Buttons A and B shift the tile used in the smiley face. The game looks for the address where the smiley tile is stored, loads the new value (LDA, remember?), and saves it (STA!) to that address. You can do even more. Change colors or even flip the sprite horizontally or vertically. Once you learn how to do this, you'll be able to control a character or manipulate other objects on the screen. Or even spawn a projectile, or jump, and more!
This is what astonished me the most about this console. You'd think storing a score would be simple. Just add up the numbers, right? 22 + 24 = 46, correct? But things are much trickier with this console. The NES doesn't really "understand" the numbers in the usual way. Well, it DOES understand them, but when it comes to putting then on screen, it works more like a car speedometer. Nintendo had to cut decimal mode from the console due to legal reasons. Even developers back then hated it.
Displaying a score up to 999'999 requires 6 bytes. 6 digits.
Since we only have a single digit per tile (this time it's a background tile, not a sprite one), you gotta do something weird.
If a single tile goes past "9", it will reset back to 0, and bump the digit to the left of it.
So, it will appear as "10" on screen. But all it's doing is something like:
(This tile represents nothing) (This tile represents 9) = 9
Adds 1 point
(This tile represents 1) (This tile represents 0) = 10
Without that, the NES would take things too literally, and it would keep shifting these tiles to like:
(This digit is 0) (This digit is 9) = 9 on screen
Adds 1 point
(This digit is 0) (This digit is A) = A on screen (the NES understands it as the tile to the right of the tile representing "9," so it displays the tile with the letter "A" on screen)
Do that enough times and you will end up displaying all the tiles until you reach $FF and then from $FF to $00 again.
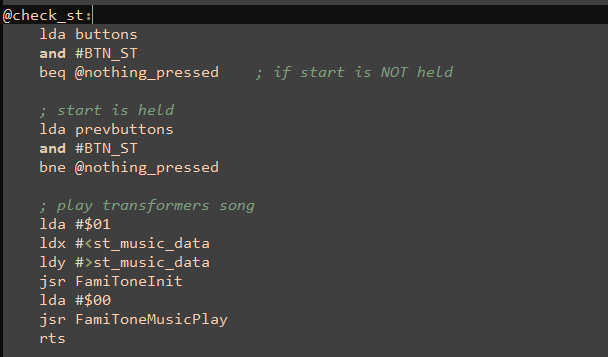
All I have to do is compose (I haven't done it yet lol) export it as a .txt file, import it to txt2data so it turns into a .s file. The .s file is imported in the project, and now you can play each song from anywhere in the ROM. From what I have seen, nsf2data is used to export sound effects. The rule is the still the same for sound effects. Export it as a .s, import it, then call it from inside the game.
Oh well, I at least know that the NES has two/four "screens" (they're called nametables, actually) and I have to update them while they're off-screen.
Like here, Do you see this? The title screen is already "on screen," but the NES' PPUSCROLL makes it seem like this game's title screen is moving from left to right. The same counts for any other game. There's so many other things I could try... Maybe later.